
Roof repairs can seem daunting, but with the right knowledge, homeowners can fix many issues.
Our homes are our sanctuaries. They protect us from the elements, providing comfort and security. The roof plays a crucial role in this protection.
However, roofs can suffer damage over time. From missing shingles to leaks, these issues can lead to significant problems if not addressed promptly.
This is where DIY roof repair comes in. You can tackle common roofing issues with the right tips and techniques.
So, let’s dive in and empower you with the knowledge to maintain the integrity of your roof.
1. Prioritize Safety Above All
Safety is the most crucial aspect of any DIY roof repair project. Roof work involves significant risks, so precautions must be taken seriously. Make safety your top priority to avoid accidents.
Begin by using the right tools. A sturdy, reliable ladder is essential for accessing your roof safely. Ensure it’s on a level surface to prevent tipping.
Protective gear is also vital. Wear non-slip shoes for better grip on the roof. Consider using gloves and eye protection to shield yourself from sharp tools and debris.
Don’t ignore potential hazards. Look out for power lines, and maintain a safe distance from them. By prioritizing safety, you set the foundation for successful DIY roof repair endeavors.
2. Conduct Regular Roof Inspections
Regular roof inspections are vital for maintaining a healthy home. Catching issues early can prevent costly repairs later. Aim to have a roof inspection at least twice a year.
When inspecting, first check for visible damage. Look for missing or damaged shingles, as these can allow water penetration. Cracked or missing flashing around vents and chimneys should also be noted.
Use binoculars for a ground-level inspection if climbing up isn’t feasible. Pay attention to any signs of sagging or depression, which may indicate structural problems. Areas susceptible to leaks often reveal discoloration or moss growth.
Inside your home, check the attic for dampness or mold. These can suggest a roof leak, even if the external damage isn’t apparent. Moisture can quickly deteriorate roofing materials, leading to bigger problems.
A detailed inspection helps you decide whether you can tackle repairs yourself or need to call a professional. With regular checks, you ensure the longevity and efficiency of your roof.
3. Identify and Address Common Roof Issues
Effective roof maintenance begins with recognizing common issues. Spotting problems early can save time and money in the long run. Here’s a list of problems you might encounter:
- Missing or broken shingles
- Cracked or faulty flashing
- Roof leaks or water stains
- Standing water on flat roofs
- Visible sagging or uneven surfaces
Missing shingles are a prevalent concern. They expose the underlying roof layer to elements, risking water damage. Replace them promptly to maintain integrity.
Cracked flashing around chimneys and vents can lead to leaks. It’s vital to inspect these areas closely and repair any cracked or damaged flashing with roofing cement.
Leaks can sneak up on you. They often show up as water stains on walls or ceilings. Acting swiftly to fix leaks can prevent further structural damage.
Don’t overlook sagging or uneven roof areas. These could signal deeper structural issues that need immediate attention. Staying vigilant helps ensure a safe and sound home.
4. Choose the Right Tools and Materials

Selecting the correct tools and materials is fundamental for any successful DIY repair. The right equipment ensures durability and efficiency in your work. It’s essential to equip yourself before beginning any project.
Start by gathering essential tools. You’ll need a roofing hammer, a pry bar, and high-quality roofing nails. A utility knife is indispensable for cutting shingles with precision.
Essential Tools and Materials:
- Roofing hammer
- Pry bar
- Utility knife
- Roofing nails
- Roofing cement
- High-quality sealant
Next, focus on materials that match your existing roof. This helps maintain a uniform appearance. Shingles come in various styles and materials; make sure to choose the right type.
5. Repair or Replace Damaged Shingles
Repairing or replacing damaged shingles is vital for maintaining your roof’s integrity. Water can seep through damaged shingles and cause further issues. Addressing these problems promptly protects your home.
Begin by identifying areas with missing or broken shingles. Look for curled or buckled shingles too, as they may need fixing. Document any findings to assess the extent of damage.
Once you’ve identified problem areas, decide whether to repair or replace them. Small repairs can be achieved with roofing cement for minor cracks. However, for extensive damage, full replacement is advisable.
When replacing shingles, ensure the new ones match your existing roof in color and material. This not only preserves aesthetic appeal but also ensures consistent protection. Proper technique in nailing and alignment is crucial to avoid future issues.
Always consider safety and weather conditions before starting work. By taking these precautions, you secure a durable and visually appealing roof.
6. Ensure Proper Flashing Installation
Flashing plays a crucial role in preventing leaks around roof openings. It acts as a barrier against water intrusion. Without it, areas like chimneys and skylights are vulnerable to leaks.
Inspect your flashing for any signs of damage or wear. Corrosion or loose pieces are common issues. These should be addressed immediately to prevent further water damage.
Proper installation is key to effective flashing. Ensure that it is securely fastened and sealed. Use a high-quality sealant to cover seams and edges for maximum protection.
Incorrect flashing installation can lead to costly repairs. Always follow manufacturer guidelines for installation. This ensures that the flashing performs as designed and prolongs the life of your roof.
Don’t hesitate to seek professional advice if unsure. A roofing contractor can provide guidance or handle more complex installations. Prioritizing proper flashing installation will safeguard your roof for years to come.
7. Maintain Gutters and Downspouts
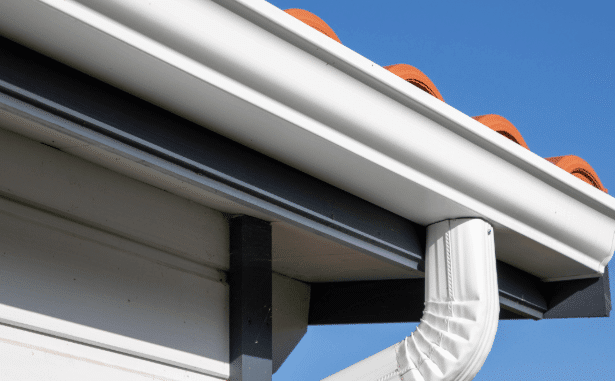
Gutters and downspouts are essential for directing water away from your home. Regular maintenance prevents water damage to your roof and foundation. Clogged gutters can lead to significant problems, including leaks and structural issues.
Check your gutters and downspouts for debris buildup. Leaves, twigs, and dirt are common culprits. Cleaning them at least twice a year is recommended to ensure proper water flow.
If cleaning becomes too daunting or hazardous, hire a professional. A roofing company can perform thorough maintenance safely. Keeping your gutters clear prolongs the life of your roof and prevents costly repairs.
8. Know When to Call a Professional
DIY roof repair isn’t always the best option. Some repairs are too complex or risky for most homeowners. Recognizing these situations can save you time and potential harm.
Complex issues like major leaks require professional expertise. Without the right knowledge, you might make the problem worse. Additionally, repairs near electrical lines pose a serious safety risk.
Consider the scale of damage. Extensive roof damage or structural issues demand professional assessment. A roofing contractor can offer a comprehensive solution.
Be mindful of safety. If you’re uncomfortable with heights or unsure about roof work, don’t hesitate to seek help. Safety should always come first.
9. Understand Roofing Permits and Codes
Understanding local roofing permits and building codes is crucial before starting your DIY roof repair. Ignoring these rules can lead to fines or forced rework. They’re in place to ensure safety and compliance.
Permits may be necessary for substantial repairs or replacements. Check with your local building department to determine requirements. This step helps avoid legal issues down the road.
Building codes ensure your repairs meet safety standards. These codes can vary widely depending on your location. Familiarize yourself with what applies to your specific project.
Failing to comply with codes might also affect your home insurance. Insurers could refuse claims related to non-compliant work. Proper adherence ensures your roof is safe and insurable.
Consulting with a roofing company can provide clarity on permits and codes. They have the expertise to guide you through these processes. When in doubt, professional advice can help navigate the complexities involved.
10. Plan Repairs According to Weather Conditions

Weather conditions can significantly influence the success of your repair project. It’s essential to check the forecast before starting any work. Bad weather could turn a minor repair into a major problem.
Clear skies are ideal for any kind of repair work. Rain, snow, or high winds can make tasks dangerous and ineffective. It’s best to schedule your repairs for a day with mild weather conditions.
Cold temperatures can make roofing materials brittle and difficult to handle. Hot weather, on the other hand, can soften shingles, making them less durable during installation. Pay attention to temperature trends when planning your work.
Embrace Regular Maintenance and Know Your Limits
Regular maintenance of your roof is vital for longevity. A well-kept roof saves money by preventing major repairs. Inspections twice a year can catch small issues before they escalate.
Not all repairs are suited for a DIY approach. It’s crucial to recognize when to call a roofing contractor. Safety and expertise are paramount for complex problems.
Diligence in roof care ensures a safe and secure home environment. By embracing regular checks and knowing your limits, you can effectively manage your roofing needs. Balance DIY enthusiasm with professional assistance when necessary.
For professional roof repair services in White Bear Lake, contact Timberline Roofing and Contracting today!