
Cedar roofing is a popular choice for homeowners looking to enhance the aesthetic appeal and functionality of their homes. Known for its durability and natural beauty, cedar shake roofing is both a timeless and environmentally friendly roofing option.
The natural hues and textures of cedar shakes can complement various architectural styles, making them a versatile choice for any home design. However, the installation process requires precision and expertise to ensure optimal performance and longevity.
In this guide, we’ll walk you through the steps involved in cedar roofing installation and the key considerations to keep in mind.
Understanding Cedar Shake Roofing
Before diving into the installation process, it’s essential to understand what cedar shake roofing is and why it’s a preferred choice for many homeowners. A proper grasp of the material and its benefits will help in making informed decisions throughout the installation process.
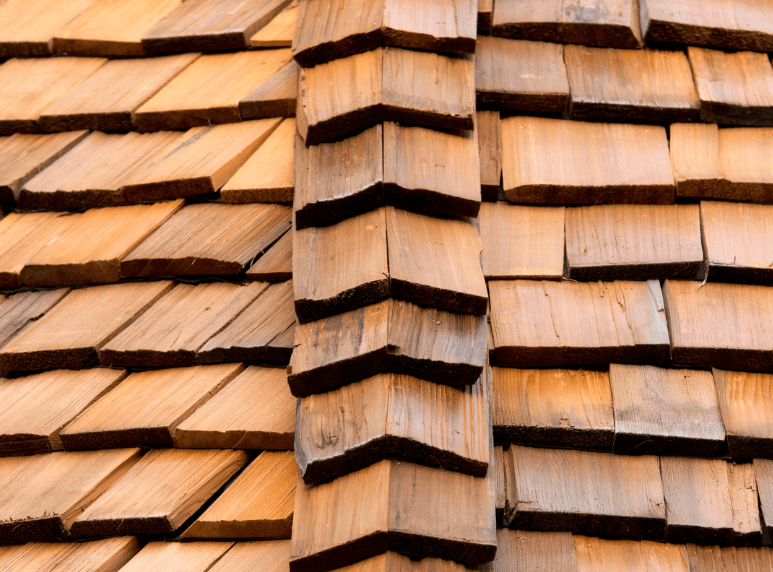
Cedar shake roofing consists of individual wooden shingles made from cedar logs. These shakes are split from logs rather than sawn, giving them a rough, textured surface that adds to their rustic charm. The texture not only enhances the aesthetic appeal but also provides a unique character to the roof, setting it apart from more uniform roofing materials.
Available in various grades and thicknesses, cedar shakes are renowned for their natural insulating properties and resistance to severe weather conditions. This resistance makes them ideal for a variety of climates, from hot and dry to cold and wet.
Benefits of Cedar Shake Roofing
- Aesthetic Appeal: Cedar shakes offer a unique, natural look that enhances the architectural style of any home. Their distinct appearance can increase curb appeal and potentially raise property value.
- Durability: With proper maintenance, cedar roofs can last up to 30 years or more. Their resilience to strong winds and impacts from debris is another notable advantage.
- Energy Efficiency: Cedar’s natural insulating properties help regulate indoor temperatures, reducing energy costs. This can lead to significant savings on heating and cooling bills over time.
- Sustainability: Cedar is a renewable resource, making it an environmentally friendly roofing option. Additionally, cedar roofs can be recycled at the end of their lifespan, reducing environmental impact.
Step 1: Preparing the Roof Deck
Before installing cedar shakes, it’s crucial to prepare the roof deck. Proper preparation ensures that the roof will not only be aesthetically pleasing but also functionally effective.
- Inspecting the Roof Deck: Ensure the roof deck is in good condition, free of rot or damage. Replace any damaged sections to provide a solid foundation for the new roof. A compromised roof deck can lead to leaks and other issues that may jeopardize the integrity of the entire roofing system.
- Installing Underlayment: Lay a waterproof underlayment over the roof deck to protect against moisture infiltration. This layer acts as an additional barrier against water damage. A high-quality underlayment can also provide additional insulation and help reduce noise from rain and wind.
Step 2: Installing the Cedar Shakes
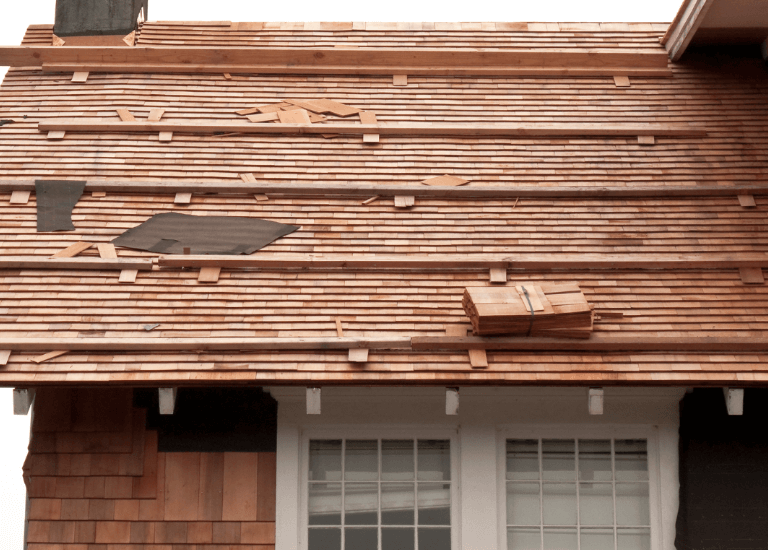
The actual installation of cedar shakes involves careful planning and precision. Each shake must be properly aligned and secured to ensure the roof functions as intended.
- Starter Course: Begin with a starter course at the roof’s edge. This involves placing the first row of shakes upside down to create a drip edge, which helps direct water away from the roof. The starter course is crucial for preventing water from seeping underneath the shakes.
- Laying the Shakes: Start laying the cedar shakes from the bottom edge of the roof, working your way up. Each shake should overlap the one below it to ensure proper water shedding. Proper alignment and spacing are important to accommodate natural expansion and contraction due to weather changes.
- Spacing and Fastening: Maintain consistent spacing between shakes to allow for expansion and contraction. Use corrosion-resistant nails to secure each shake, driving them through the thickest part to avoid splitting. The nails must be of the appropriate length to ensure they penetrate the roof deck adequately.
Step 3: Finishing Touches
Once all the cedar shakes are installed, complete the finishing touches. These final steps ensure the roof is not only functional but also aesthetically pleasing.
- Ridge Cap Installation: Install a ridge cap along the roof’s peak to seal the top and prevent water infiltration. The ridge cap also provides a finished look to the roof and helps with ventilation.
- Flashing: Add flashing around chimneys, vents, and other roof protrusions to ensure a watertight seal. Properly installed flashing is critical for preventing leaks in areas where the roof meets vertical surfaces.
- Final Inspection: Conduct a thorough inspection to ensure all shakes are securely fastened and the roof is properly sealed. This step is crucial for identifying any potential issues before they become significant problems.
Cedar Roof Maintenance
To maximize the lifespan of your cedar roof, regular maintenance is essential. Proper care can prevent minor issues from becoming costly repairs.
Routine Inspections
Conduct routine inspections at least twice a year to identify and address any potential issues early. Look for signs of damage, such as cracked or missing shingles, and replace them promptly. Regular inspections can also help identify other issues, such as pest infestations or mold growth.
Cleaning and Moss Control
Keep the roof clean by removing debris and leaves that can trap moisture. Additionally, control moss growth by applying a moss control treatment specifically designed for cedar roofs. Moss can retain moisture, leading to rot and other damage if not controlled.
Professional Maintenance
Hiring a professional roofing contractor for regular maintenance and inspections can help ensure your cedar roof remains in top condition. Professionals have the expertise to spot and address issues that may not be apparent to the untrained eye.
Choosing the Right Roofing Contractor
Selecting a qualified roofing contractor is crucial for a successful cedar roofing installation. The right contractor can make the difference between a durable, beautiful roof and one that requires frequent repairs.
What to Look for in a Roofing Contractor
- Experience: Choose a contractor with extensive experience in cedar roofing installation. Experience ensures familiarity with the unique challenges and techniques associated with cedar roofs.
- References and Reviews: Check references and online reviews to gauge the contractor’s reputation and reliability. A contractor with a solid track record is likely to deliver quality work.
- Licensing and Insurance: Ensure the contractor is licensed and insured for your protection. This protects you from liability in case of accidents or damage during the installation process.
Questions to Ask a Roofing Contractor
- How long have you been installing cedar roofs? Understanding their level of experience can help you gauge their expertise.
- Can you provide references from previous clients? Speaking with past clients can provide insight into the contractor’s reliability and quality of work.
- What is your approach to cedar roof maintenance and repair? Knowing their approach can help ensure they will be able to provide ongoing support for your roofing needs.
Conclusion
Cedar roofing brings warmth, character, and long-lasting protection to your home, but proper installation is key to getting the best results. Choosing experienced professionals and staying consistent with maintenance can help you get the most from this distinctive roofing material.
If you’re planning a cedar roof installation in the Austin area, call Timberline Roofing and Contracting to get a quote today. Our team has the skill and attention to detail needed for a smooth, high-quality installation. We’re here to help you protect and enhance your home with confidence.